Alpha Channeling
Do you ever wonder how to mask out those frizzy hairs in Photoshop? Making a clipping path for all those strands is more than an arm numbing job but a dull punishment of some sort for many creative graphic artists. So we will explore how to ease that chore out.
For this post, we will be discussing the basics of Alpha Channeling. Alpha channels as we all know is another type of image masking. Alpha Channel is a specialize selection process that's use to edit and store selections you made using the pen tool, lasso and magic wand.
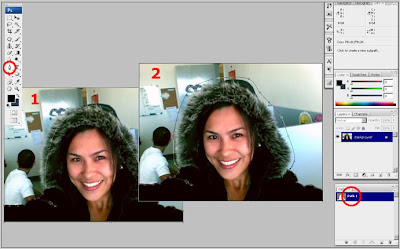
1. Open the image of your choice, select the pen tool and make a clipping path on the part of the image you want to edit. If you've noticed, I have two images with the labels “1” and “2”. This represents the two clipping paths I’ve made for this image. For the image with the label “1”, I did a clipping path on the inner part of the hood. (Notice the faint clipping path line). For the image with the label “2”, I made a clipping path on the outer part of the hood. (The clipping path is more obvious in this image)
Continue learning with this tutorial by clicking this alpha channels link
For this post, we will be discussing the basics of Alpha Channeling. Alpha channels as we all know is another type of image masking. Alpha Channel is a specialize selection process that's use to edit and store selections you made using the pen tool, lasso and magic wand.
With that being said, alpha channel is a masking technique which defines a selection in black, white, and varying shades of Gray pixels. White acts as the selected pixels; black acts as the unselected area and the levels of Gray define what is partially unselected or selected depending on your view point.
1. Open the image of your choice, select the pen tool and make a clipping path on the part of the image you want to edit. If you've noticed, I have two images with the labels “1” and “2”. This represents the two clipping paths I’ve made for this image. For the image with the label “1”, I did a clipping path on the inner part of the hood. (Notice the faint clipping path line). For the image with the label “2”, I made a clipping path on the outer part of the hood. (The clipping path is more obvious in this image)

Continue learning with this tutorial by clicking this alpha channels link
![]()
|
|


2 comments:
Hi,
Cool. I'm just learning Adobe photoshop. Liked your clipping path demo.
Hehehe.. Thanks, I'm glad that you found our tutorials interesting...
Post a Comment
I'm hungry for your thoughts. Tell me what you think... ;P